Whitelist Instructions for Newsletter

As one of your partners, we’d like to make sure that you stay in the loop!

CHIA Vic Email Whitelist Instructions

Sometimes external emails are blocked with filters and treated like malicious emails phishing, scams and spams. To ensure our newsletters reach your Inbox, we ask that you add admin@chiavic.com.au to your approved list of senders, contacts or address book, also known as “Whitelisting.”

Is your email client or spam filter not listed?

  • If you do not see an email from admin@chiavic.com.au in your Inbox, the email may have mistakenly been sent to your spam/junk folder. Open your spam folder and if you find an email from admin@chiavic.com.au open it and mark it as “Not spam”
  • If admin@chiavic.com.au is being filtered, try adding admin@chiavic.com.au to your Address Book or Contact list.
  • If messages continue to be sent to your junk folder contact your ISP or spam filter application support

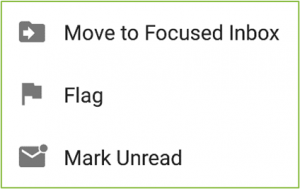
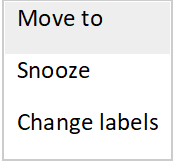
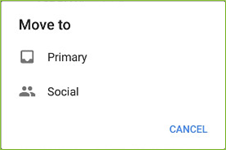
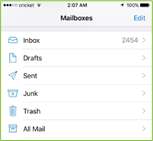
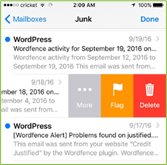
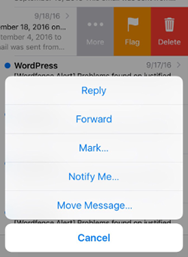
How to whitelist admin@chiavic.com.au

Select your email provider/security software/filters below to whitelist admin@chiavic.com.au

Popular Apps

Outlook Mobile App

Outlook’s mobile app now offers a “Focused Inbox” for your important email.

To add admin@chiavic.com.au to your list of Focused Inbox on the Outlook App, open the mobile Outlook app on your Android, Microsoft or iPhone and locate the email from admin@chiavic.com.au:

  • Click the dropdown menu (the ellipsis) on the top right of your Inbox.
  • On the menu displayed tap Move to Focused Inbox   Picture2
  • Select the Move this and all future messages
  • Tap Move
  • Now all future messages from comms@chiavic.com.au will appear in your Focused Inbox

You can also remove unwanted emails from your Focused Inbox as well by repeating this process in your Focused tab.

Outlook 2003, Outlook 2016 and Outlook Office 365

Adding admin@chiavic.com.au to your list of “Safe senders” on Outlook ensures that you continue to receive newsletter emails in Outlook Office:

  • Right click our email in your Inbox email list pane.
  • On the menu displayed move your mouse over or tap Junk
  • Click or tap on Never block senderin the menu that rolls out.
  • The resulting popup will say:
  • “The sender of the selected message has been added to your Safe Senders List.” and click OK

To add sender to address book:

  • Open the email
  • Right click on the from address
  • Choose Add to contacts option
Outlook.com

Previously “Hotmail”, “Live”, “Windows Live” and “MSN”…

In the new Outlook.com you must click the Wait it’s safe link if you find comms@chiavic.com.au incorrectly identified as spam and by entering the email contact in the address book or contacts, it no longer whitelists the sender.

  • Check the Junk If you see the admin@chiavic.com.au email in your Inbox
  • Open the email from admin@chiavic.com.au.
  • Click the “Wait it’s safe” link

Mark Sender as “Wait it’s safe”

Picture3

Manually Add to Safe List

  • Click gear the icon on the top right.
  • Select Optionsin the drop down list.
  • On the Options page under Preventing junk email click Safe and blocked senders
  • Click the link Safe senderson the next page.
  • Enter the email address admin@chiavic.com.au in the text box.
  • Click Add to list
  • admin@chiavic.com.au will now be added to your list of Safe senders
  • Emails added to your Safe senderswill not be delivered by mistake to your Junk
Gmail

Mark messages as ‘Not spam’

If Gmail has marked emails you wish to whitelist as spam, tell Gmail the emails are not spam.

  • In Gmail, navigate to the spam folder.
  • Search for emails containing the domain you wish to whitelist (eg onlinegroups.net).
  • Select all the emails shown.
  • Click Moreand then Not spam.

Create a filter for the address

  • Create a filter to tell Google to whitelist email from chiavic.com.au domain by clicking on the Cog icon in the top-right corner, and then Settings
  • Click on Filtersand then Create a new filter

Either

  • enter the domain(chiavic.com.au) to whitelist in the From field or
  • enter the email address (admin@chiavic.com.au) to whitelist in the To field
  • Click Create filter with this search
  • In the box headed When a message arrives that matches this search select Never send it to spam
  • Click the Create filter button

Tips:

  • Do not enter email addresses in both the From and To fields as Gmail will only filter in emails that meet both criteria
  • In both the From and To fields, you can enter either a specific email address or an entire domain
Gmail Mobile App
  • If you are using the Gmail Mobile App on your mobile device, please check the Spam Folder.
  • Once the email is opened, tap the ellipsis icon
  • Select “Change labels…”

Untitled

  • Check the box next to Inbox
    Untitled2
  • Tap OK to save your settings
Gmail Tabs
  • Open Promotions tab in Gmail and open the email from admin@chiavic.com.au
  • Tap the menu ellipsis icon – top right.
  • Then select Move to.
    Untitled5
  • Then select Primary from the list.

Untitled4

  • This should help Gmail to know, you always want to see admin@chiavic.com.au in your Primary Inbox tab…
Yahoo! Mail
  • Check your Spam Folder and locate the email
  • Click the Not Spambutton on the top toolbar.

To create a filter to automatically send email from admin@chiavic.com.au to your Inbox:

  • Move your mouse over or tap the Gear icon in the top right navigation bar.
  • Select Settings from the list that drops down.
  • Choose Filters located on the left side of the page.
  • Click the Add button on the Filters page.
  • Create a name such as Whitelist in the Filter name
  • In the From field leave the default contains
  • Enter our email address admin@chiavic.com.au in the text box next to ..
  • Choose the destination folder to which you would like the message delivered. For example: Inbox.
  • Click or tap ..
  • You will see in the next screen -Deliver to Inbox if From contains admin@chiavic.com.au
  • Click or tap Save on this screen.
  • You will be returned to your Yahoo! Inbox.
iPhone Mail App

iPhone Mail identifies most junk mail (spam) sent to your @icloud.com address or aliases, but it can mistakenly move email incorrectly to your Junk mail folder. Periodically check the Junk folder for email messages that were marked as junk mistakenly.

To indicate that an email message from admin@chiavic.com.au is not junk:

  • Open your Mail app and go to the Mailboxes screen
  • Scroll down to the folders area
    Iphone
  • Select the Junk folder.
  • Find the email from admin@chiavic.com.au and slide it left to see options.
    Iphone2
  • Tap the More and then Mark button.
    Iphone3
  • Tap the Mark as Not Junk button.
    Iphone4
  • The message is moved to your Inbox. Subsequent email messages from admin@chiavic.com.au will no longer be marked as junk. By default, messages in the Junk folder are deleted after 30 days so be sure to check it often whitelist relevant email.


Security Software

Norton AntiSpam

This problem may occur if comms@chiavic.com.au is accidentally added to the Blocked List. To remove the comms@chiavic.com.au from the Blocked List:

  • Start your Norton product.
  • Click Settings.
  • Depending on your Norton product, do one of the following:

For Norton 360:

  • In the Settings window, under Detailed Settings, click AntiSpam.
  • On the Filter tab, next to Blocked List, click Configure.

For Norton Internet Security:

  • In the Settings window, on the Network tab, click Message Protection.
  • Under AntiSpam, next to Blocked List, click Configure.
  • In the Blocked List window, select the item that you want to remove, and then click Remove.
  • Click Apply, and then click OK.
  • If you do not find comms@chiavic.com.au in the Blocked list, go to next step.

To add comms@chiavic.com.au to the Allowed List:

  • Start your Norton product.
  • Click Settings.
  • Depending on your Norton product, do one of the following:

For Norton 360:

  • In the Settings window, under Detailed Settings, click AntiSpam.
  • On the Filter tab, next to Allowed List, click Configure.

For Norton Internet Security:

  • In the Settings window, on the Network tab, click Message Protection.
  • Under AntiSpam, next to Allowed List, click Configure.
  • In the Allowed List window, click Add.
  • In the Add Email Address window, from the Address Type drop-down, select the address type.
  • Add comms@chiavic.com.au, and then click OK.
  • In the Allowed List window, click Apply, and then click OK.
McAfee Products

While McAfee has removed spam protection in the latest Anti-Virus software- You may still have a version that offers spam filtering.

  • In order to add comms@chiavic.com.au to the whitelist, open McAfee and click on Web & Email Protection.
  • Then click on Anti-Spam

There you can see various settings. You can change the spam protection level, change filter settings, etc.

  • Click on Friends list
  • Add comms@chiavic.com.au to your “Friends List” to allow emails from comms@chiavic.com.au.
Trend Micro

If you received an email message from comms@chiavic.com.au that was incorrectly moved to the Spam Mail folder by the Anti-Spam Toolbar you can prevent this from occurring in the future.

The Anti-Spam Toolbar detects spam by looking for certain keywords in the email’s subject or body. Occasionally, it may detect what you consider legitimate email as spam.

To prevent this from occurring you can do either of the following:

  • Add the comms@chiavic.com.auto the list of Approved Senders.
  • Decrease the Spam Email Filter Strength.

Note: You can also select the email and click Not Spam to report it to Trend Micro. However, this feature serves only as a reference to their spam database, and it may not have an effect on how the toolbar detects spam.

Add the sender to the list of Approved Senders:

  • Open Microsoft Outlook.
  • Click the Spam Mail folder then select the legitimate email detected as spam.
  • Click Approve Senderon the toolbar.
  • Click Yeswhen the confirmation message appears.

Decrease the Spam Email Filter Strength:

  • Open Microsoft Outlook.
  • Click Trend Micro Anti-Spam then click Settings.
  • On the Spam Filter tab, move the slider bar to select a lower filter strength.
  • Click OK to save your settings.

Spam Filters

Cloudmark SpamNet

Cloudmark filters email based on content footprints. To assure our email has not been mis-identified as spam:

  • Select Cloudmark | Options… from the Cloudmark SpamNet toolbar in Outlook.
  • Click Advanced.
  • Go to the Whitelist tab.
  • Click the Add button.
  • Type: comms@chiavic.com.au
  • Click OK.
SaneBox

Sanebox is not a filter, but a filtering system trained by you.

  • Open your Webmail or Gmail where you use SaneBox.
  • Open your @SaneLater folder.
  • If you find an email from comms@chiavic.com.auor an email from comms@chiavic.com.auin @SaneLater…
  • Drag & drop the email from comms@chiavic.com.au to your Inbox folder.
  • By doing this you will always get our great content in your Inbox from now on!
Spam Assassin

Spam Assassin is usually administered by your server admin. Please contact your admin and request that he or she:

  • Add the following entry to your user_prefs file, which is found in the .spamassassin subdirectory on your web/mail server
  • whitelist_from comms@chiavic.com.au
  • Save the user_prefs file or move the updated copy to your .spamassassin subdirectory.
Barracuda Networks

Occasionally, Barracuda Spam Firewall will mark a legitimate message as spam. There are two methods to whitelist email senders.

Whitelist Quarantined Senders:

  • Open your email client. Barracuda should send you a summary each day listing quarantined items. Choose the most recent Barracuda email message.
  • Locate the email from comms@chiavic.com.auand the sender email address comms@chiavic.com.authat you do not want quarantined in the future. Click on the word “Whitelist,” which is in green print to the right of the email title. This will open your list in a web browser.
  • Click the box to the left of the email that you would like to whitelist. At the top of the page, click “Whitelist.” Barracuda will not block or quarantine the sender whose email address appears on the whitelist.

Whitelist Senders and Domains:

  • Open your web browser. Navigate to your company’s Barracuda firewall homepage.
  • Click on the Block/Accept
  • Choose “Sender Domain Block/Accept.” Enter the Domain name from comms@chiavic.com.auto whitelist. For example, you can enter aol.com to allow all AOL addresses.
  • You may enter a comment to remind you why you allowed this Domain. Click “Add.”
  • Click your mouse on the “Email Sender Block/Accept” tab. Enter the email address of an individual sender that you want to whitelist, such as “comms@chiavic.com.au
  • Include a comment. Click “Add.” In the future, Barracuda will not block emails from this sender.

Most Used Spam Filters

SPAMfighter

Highlight the email from comms@chiavic.com.au with the email address comms@chiavic.com.au to Whitelist.

Click “More” in the SPAMfighter Toolbar and select “Whitelist”.

Here you can choose if you want to Whitelist the email address comms@chiavic.com.au or the whole Domain.

To be sure that all emails from people in your Outlook contacts get through to you, you can import and Whitelist them.

To do this, follow these steps:

  • Click “More” in the SPAMfighter toolbar.
  • Then “Options”
  • Then “Filter settings”
  • Then “Blacklists & Whitelists”
  • Then “Whitelist email address”
  • Then “Import”.
  • Select your ‘Address Book’ and click on “Check all”
  • Click “Add” and “Apply”

If you get a pop-up box offering you to upgrade to SPAMfighter Pro, it is because you have exceeded the limit of 100 addresses. You can fix this by buying SPAMfighter Pro or by deleting some of the addresses in your Black/White list. If you want to delete addresses, please go to:

  • Click More” in the SPAMfighter toolbar.
  • Then “Options”
  • Then “Filter settings”

Then “Blacklists & Whitelists”

Mail Washer
  • Click Tools, then Blacklist & Friends.
  • Click Add… on the right, the Friends list side.
  • Make sure Plain email address is selected.
  • Type: comms@chiavic.com.au and click OK.
ChoiceMail
  • Open ChoiceMail
  • Click on the Senders tab
  • Choose “Approve another Sender”
  • Type in the sender email address comms@chiavic.com.au
  • Click on OK
Spam Sleuth
  • Select File, then Configure.
  • Go to the Friends category.
  • Make sure Active is checked.
  • Type: comms@chiavic.com.auon a line by itself in the entry field.
  • Click OK.